A Nickel Plated Showcase – The Mulliner Lamp

Project alignment
We’d worked with Alexander Joseph – a small luxury cordless lamp start-up local to us – on some exclusive custom lamp projects, and had spoken about further collaborations, so we had a bit of a head start in terms of ideas.
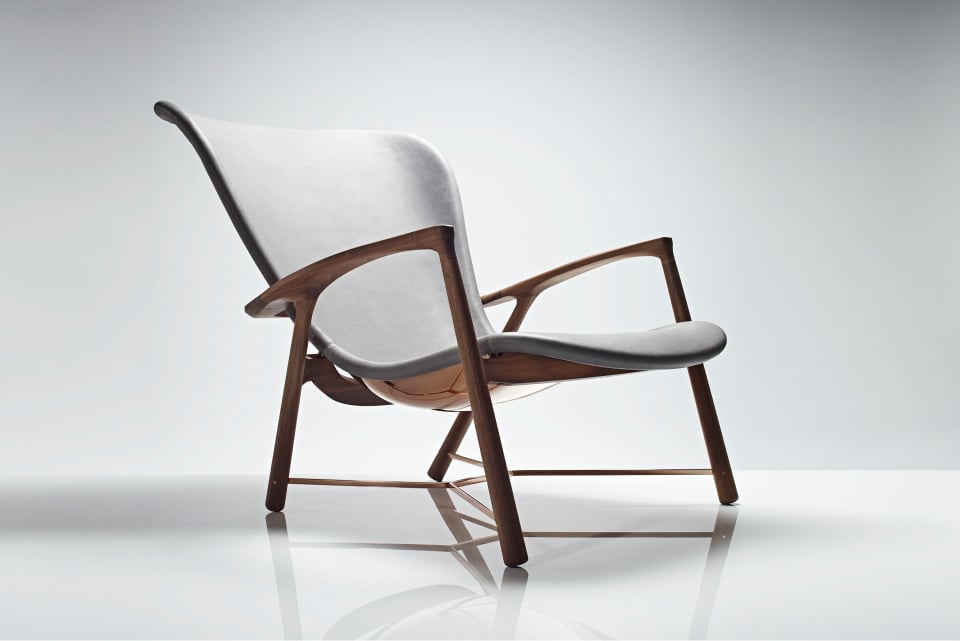
We’d also proven our capabilities with work we’d already done for them, and with other statement pieces DMark had created in the luxury-interior space, such as the Silhouette Chair project for LINLEY. In short, they already had full confidence in our creative and manufacturing credentials, and were happy to let us run with whatever we decided on.
Meanwhile, we’d already considered the challenge of recreating the ‘Chesterfield’ sofa upholstery stylisation in metal, which has similarities with Bentley’s interior embroidery designs, so it felt like the planets had somehow aligned.
An open brief
The team at Alexander Joseph effectively said, ‘do what you like’, which is testament to their trust in our imagination, capability and craftsmanship. Our only non-creative considerations were the fixed positioning of the circuit board and charging port, and to provide enough room in the base to house the battery pack. Like all Alexander Joseph lamps, it would be cordless, and not plug into the mains except to charge. They use a specially designed and particularly powerful Lithium-ion rechargeable battery pack and accompanying electronics, which together control and sustain an impressive 52-56-hours of life between charges.
DMark would handle everything except for the supply of Alexander Joseph’s proprietary circuit board, connectors, battery pack and bulb. They would also deal with and source the shade, as they do on all their bespoke lamps, as well as handle the electrical commissioning, shade configuration and final assembly
From 'Mushroom' to 'Milliner'
Our working name was the ‘Mushroom Lamp’, based purely on the vague shape. It was only after completion that Alexander Joseph aligned it with Bentley Motor Cars and renamed it the Milliner Lamp. Much better! We think they also reached out to Bentley to use it as part of their 100-year anniversary, but sadly COVID-19 scuppered any major celebrations in that respect.
Copper, you spin me right round
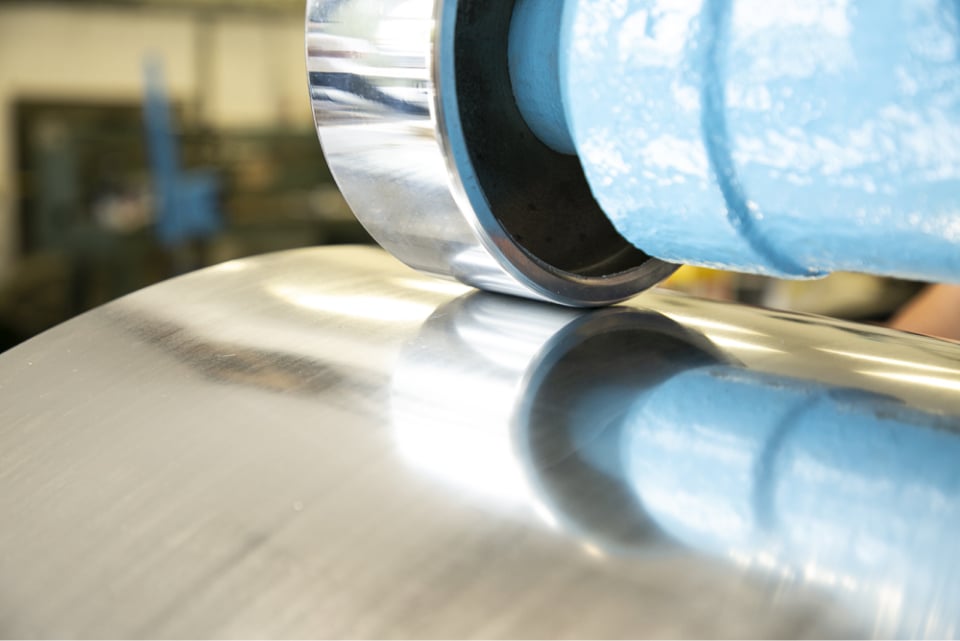
Metal spinning is arguably the only way to achieve a consistent hemisphere in sheet metal, and with free licence in terms of its size and shape, we agreed that using one of the spinner’s own chucks or mandrel forming tools was the way to go.
For this project, the base metal we used was copper, because it’s relatively soft and can be worked and annealed easily. It also electroplates and polishes, is easy to spin, and solders well. And being non-ferrous, it doesn’t rust. Copper is also heavier than other alloys like aluminium, so it gave the piece a sturdier, weightier feel which was also something we wanted.
Achieving the quilt aesthetic
We’d settled on the idea – and the challenge – of creating a ‘quilted Chesterfield effect on a hemisphere. We also decided to make it even more impressive by factoring in precisely how the diamond shapes would naturally ‘stretch’ on the curvature of the lamp base.
No diamond would be the same, and no lamp would be anything like it!
A quilted pattern in metal? We have the perfect tools for that...
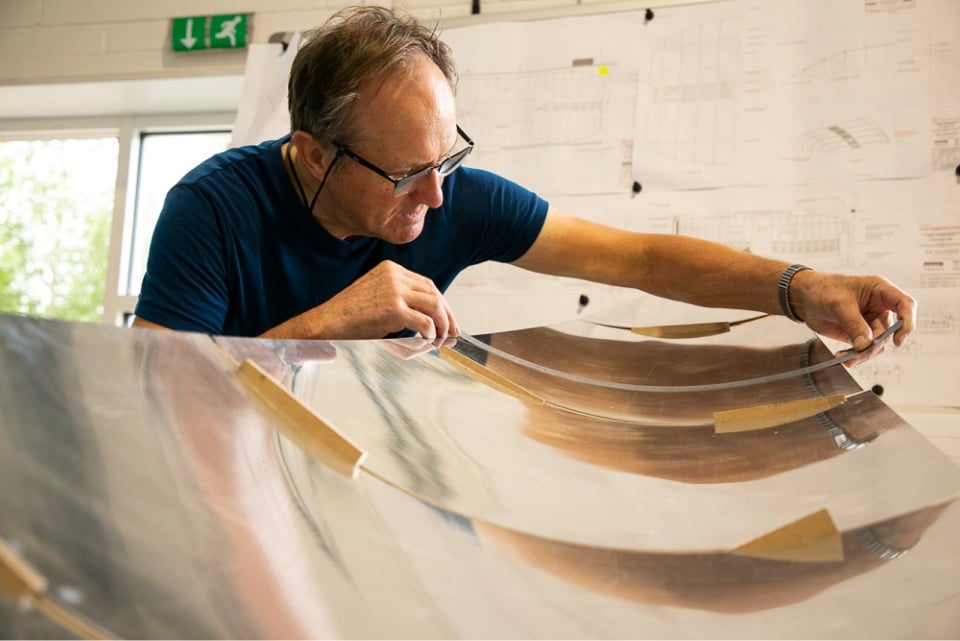
The ‘quilt’ pattern is tricky to achieve in the way we wanted to showcase it, but we had already designed and made our own tooling to fit our English Wheel – specifically for creating this kind of pattern in sheet metal. Its ‘bottom anvil’ is our secret sauce for this fabrication technique, allowing us to delicately support the metal either side of the top anvil’s centre point so it doesn’t get bruised. With fine adjustments, it gives us complete control over what we do. In this case, it meant we could produce, by hand, the delicate grading of the ‘troughs’ between the quilted diamond sections. Meanwhile, top-anvil diameters allow us to work flat panels, and also the non-flat panels that give the piece its dome shape.
Patiently perfecting the hemisphere
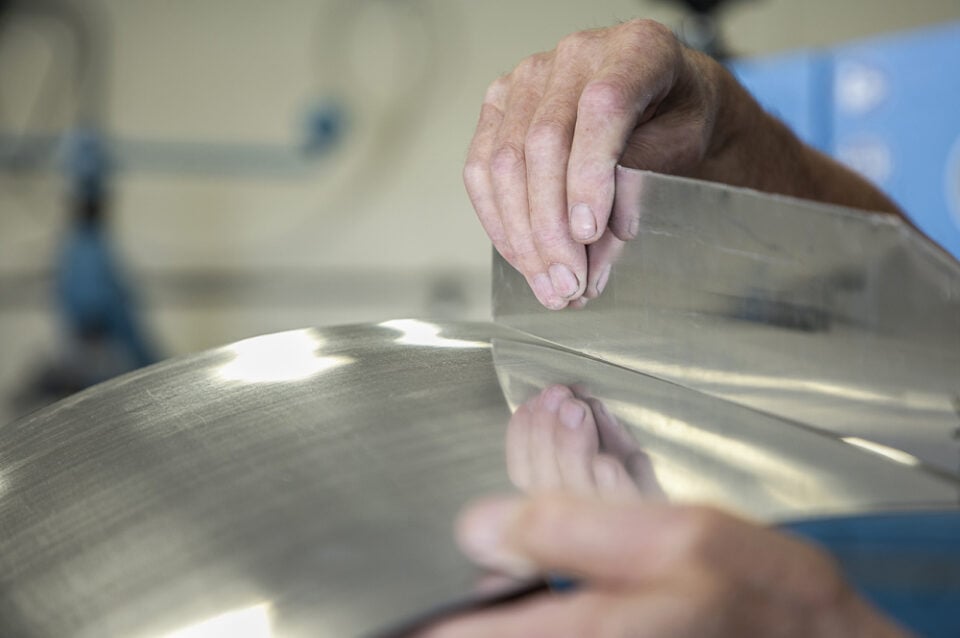
We also wanted to get the quilted diamonds to look as ‘bulbous’ as we could. To achieve this, we needed to stretch the metal before swaging the lines. Don wheeled out the spun copper hemisphere to stretch it with skill, sensitivity and precision. At first, it looks strange and deformed, a bit like a wild mushroom, but we knew that by methodically bead-rolling or swaging out the lines it would tighten up the copper, and pull the surface back down to a shape close to the original spun surface.
We wheeled out all the lines incrementally, not all in one pass. The troughed areas also needed localised annealing where necessary. We knew that being patient and delicate, and continuously stepping back to take a holistic view of the piece, was the only way to achieve the standards we’d set ourselves (and always do!).
Structural strength and the Fibonacci sequence
We wanted to ensure strength and rigidity in the design (as the weight was distributed more at the base) so the whole lamp could be picked up by the narrow stem.
Considering the likely overall mass of the finished lamp, we ensured structural strength and integrity of the centre stem by fabricating an internal framework made from brass profile, which the bulb stem would connect to and be supported by.
The metal base that all the electrical componentry was mounted to, was made from stainless steel plate, which naturally provided more mass lower down.
We also tried to make the diameter of the base and the height of the stem and overall lamp consistent with ‘golden ratio’ principles. This was perhaps more an aesthetic touch, and a nod to the principles of well situated design and weight distribution, but it also made sense from a physics perspective.
UBS port and circuit board positioning
We angled the whole motherboard so that the flat side of the USB port was parallel with the dome’s arc. This was tricky, because it meant quite a few assemblies, small changes and re-assemblies. Eventually we were able to get the port in the perfect position: as close as possible to the inside of the dome, so it looks like you’re plugging directly into the metal.
A detachable base for maintenance or upgrade
We also had to make the base plate detachable, to make the circuit board, internal wiring and battery pack accessible – without compromising the exquisite shaping and finishing.
We used machine screws threaded into the brass profile detail supporting and retaining the stainless steel base. We’d fabricated a brass profile (one that’s incredibly hard to source these days) to wrap around the copper hemisphere’s lower circumference, which entailed shrinking and annealing to a strict diameter. Fortuitously, we’d kept this piece of brass in storage for years… we always knew it’d come in handy someday!
Preparing for nickel plating
We knew from the beginning we wanted a nickel finish, but there are no shortcuts in preparing for this. We know – we’ve searched for one. It simply takes hours of patient, meticulous surface finishing using small files, abrasive papers, pads and polishes. We were able to blend the soft and silver soldered areas out, so that when plated it would look smooth and natural. We’re used to this sort of measured work, as we do it a lot on the brass Aston Martin DB2 trim and bright-work products DMark manufacture and sell. It’s a labour of love, but the end results always look splendid. When nickel-plated, it all looked like one seamless part with a fully consistent finish.
You never know where a project will lead...
The team at Alexander Joseph was hugely impressed with the dedicated craftsmanship we’d applied to the Mulliner Lamp, and appreciated the concept and its execution. It’s really nice to occasionally have free creative reign, and for the results to be so well received.
It is, of course, a premium piece, and a creative triumph! It factored in the required functionality, and allowed DMark’s creative metalwork experience and dedication to the craft to shine through. Others agree, even if we do say so ourselves!
Following on from this project, we continue to work with Alexander Joseph from time to time. Most recently, we made a set of four elegant bespoke lamps destined for the Middle East. This time, they had the design and the brief, so we just worked out how best to create them.