Bespoke canopy and flue cowling for DKT Artworks
Something you're interested in?
Peter Linnett, Design and Project Manager at DKT Artworks, called DMark to see if we were interested in manufacturing a high-end bespoke canopy and flue cowling. The canopy would be aluminium, effectively a cosmetic wrap to hide the flue’s ‘functional but not particularly attractive’ lower section. DKT produces wonderfully intricate, decorative, textured finishes on all sorts of substrates, and they would apply their overlay directly onto the formed aluminium once we’d completed the fabrication.
We’d spoken with Peter in 2014 in his personal capacity as an artist, about a collaboration on some unique artistic metalwork. Our schedule at the time meant we couldn’t help, but Peter was fully aware of our capabilities and attention to detail across a wide variety of metalwork, and got back in touch after joining DKT Artworks.
We have a good relationship with Peter, as he also loves working with metals – just in a different way. Working with him was easy, as he has a sound artistic understanding of different types of metals and fabrication processes, and could answer our questions and creative propositions effectively. He can also appreciate what the possibilities are (and aren’t).
Aluminium: the perfect metal for the job
For this project, we advised using aluminium because it’s light, relatively easy to work, and is non-ferrous so won’t rust like mild steel. And because DKT were going to paint over the aluminium shell, it didn’t need to be polished, or even finished with a fine abrasive. It simply needed to be shaped accurately and encapsulate the design aesthetic while being fit for purpose. As ever, though, DMark offered the best possible response to the client’s brief.
Meanwhile, our experience and meticulous attention to detail meant we could also address finer points and considerations as they became apparent during the creative process. For example, how exactly we would complete the bullnose rim, and shape and attach the upper cowling.
A ‘chimney sweep’
The shape we agreed on was very attractive, but not easy to make. It was narrow across the middle of the large oval base perimeter, and would morph upwards and change shape into an even narrower circular diameter where the surface joined the flue cowling. The form was symmetrical about an axis, so each panel section had to remain consistent with its equal and opposite side.
We created the upper cylindrical cowling in two equal parts, and it had to marry seamlessly with the larger lower oval section; it was effectively one piece when fully installed, with no visible joins. So in all, it’s three pieces, as it would have been impossible to install on-site as one complete body. The room’s configuration also meant we had to engineer our way around things, but we’re used to identifying and solving potential snags before they become expensive headaches or deadline-busters.
Effective input
Providing a surface finish that was suitable for hand-paintwork and aesthetically pleasing meant carefully forming the edge of the oval rim, which was to be a ‘bullnose’ profile… a bit like a large wired edge, but without the wire. We’d agreed with Peter that the bullnose would be of a sufficient size at head-height in the finished room, yet complement and blend with the overall design.
The internal gather was supplied by another source, and we needed to find a simple but effective way to level the canopy off of the internal gather hood. This adjustability wasn’t specified initially, but soon became apparent.
Deft forming on the English wheel
It was obvious we had to construct it in multiple sections and weld them together (in this case we gas-welded it butt-to-butt with no filler rod). We divided the entire form into six sections (three symmetrical to another three) to make handling and forming manageable. The process involved extensive work on the English wheel, which Don has great skill with. He delicately created the long sweeps, taking great care not to overstretch the edges.
When experience counts
The key here is knowing when and where to apply more or less stress on the panel. We would continuously offer up the different sections against the buck to gauge how the panel shape was progressing. The really difficult part was knowing when, and how much, to taper out the pressure of the wheeling, and this is something you only really develop an instinct for through years and years of hands-on experience.
Of course, the joints also had to be spot-on alignment wise, to help avoid any ripples or deformations in the panel after welding (which would create a lot more work). Gas welding over a long length is tricky, and demands accurate panel forming to get it spot on, but we knew it was the best way to achieve the precision and quality the project demanded.
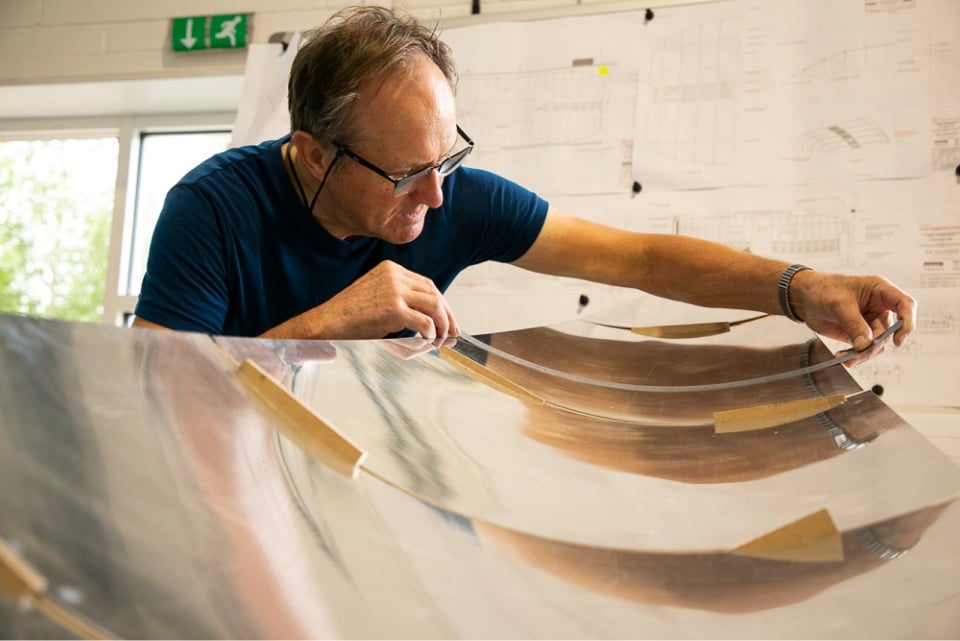
Using lasers
To help us align and construct the aluminium panel sections, we designed and made a full-size timber buck specially for the job, which sat proudly and at the correct working height in our ground-floor workspace.
We even used lasers to establish levels and panel joint positions. Note that handheld laser welders weren’t really a viable option at the time – at least not for this type and scale of job. DMark has since invested in a brilliant handheld laser welder, and it really is a step-change in equipment and technology. It pretty much makes all other types of welding obsolete. If we did the same project today, we’d definitely use it!
Perfectly cylindrical cowling
We split the flue cowling’s long and narrow cylinder into two parts down its length, and added an internal flange on both sides to allow the sections to come together in a pincer movement each side of the already installed flue. We had pre-drilled and aligned countersunk rivets so that the team on-site could rivet the two parts together whilst in-situ. The end result was a perfectly cylindrical cover that connected neatly to the lower aluminium bell-shaped hood. The canopy itself was also riveted to the cowling in situ. We’d pre-aligned, pre-drilled and countersunk the whole piece together in our own DMark workspace. This logical approach allowed DKT, who aren’t experienced metalworkers, to do the job easily and with full confidence.
Meanwhile, a bullnose return around the elliptical circumference helped us in finishing the outer edge. We did this with our in-house hand-made tools – a special hammer and dolly. Our technique significantly stiffened the whole canopy and helped lock in the correct elliptical dimensions for a really eye-pleasing shape. After that, we carefully welded in the flat base, which again helped to pull the metal into position and ensure it maintained the correct dimensional constraints.
The flat canopy base section
Custom-built from flat sheet aluminium and angle, we worked alongside Peter on this, allowing the canopy to rest upon the gather. DMark devised a way to level the canopy from four points, by having four threaded adjustment pads to ensure precision, ease of use, and flexibility in installation for the teams on-site.
Late nights and early mornings
The completed canopy and flue were finished at around 3 o’clock one morning in our Dorset workshops, and ensured it was on-site in London by 8 o’clock.
The result: a truly unique and functional work of art
Until the final stages of installation, it’s hard to gauge what it will really look like, but as we got close to completion, we began to realise how unique and impressive the piece was. The fact that it functions perfectly as a canopy hood while making a bold creative statement is a nice feeling, too. The end client was really taken with it, so it was another highly rewarding but demanding project. It’s great when you can apply existing skills to different projects and sectors, but continue learning and adapting as you overcome challenges.
We’ve since done some smaller pieces for DKT Artworks, involving curved brass profiles similar in nature to those on the Napier Room project. We made bespoke tooling for both projects – both would have been much more difficult without them.
We’ve stayed in touch with Peter Linnett, who has since established Opus Metallum, a loose network of support for interior designers and architects creating exceptional one-off and limited edition metalwork pieces. We speak from time to time, and Peter includes DMark in his ‘network of specialists’.